In today’s world, Photoshop is a much valued tool to improve and enhance photos. Users can do everything from brightening up the image to putting the picture through a whole new filter. Transforming photos into watercolour paintings is becoming a popular trend, and gives users the power of changing an average looking picture into a masterpiece.
1) Choose your photo
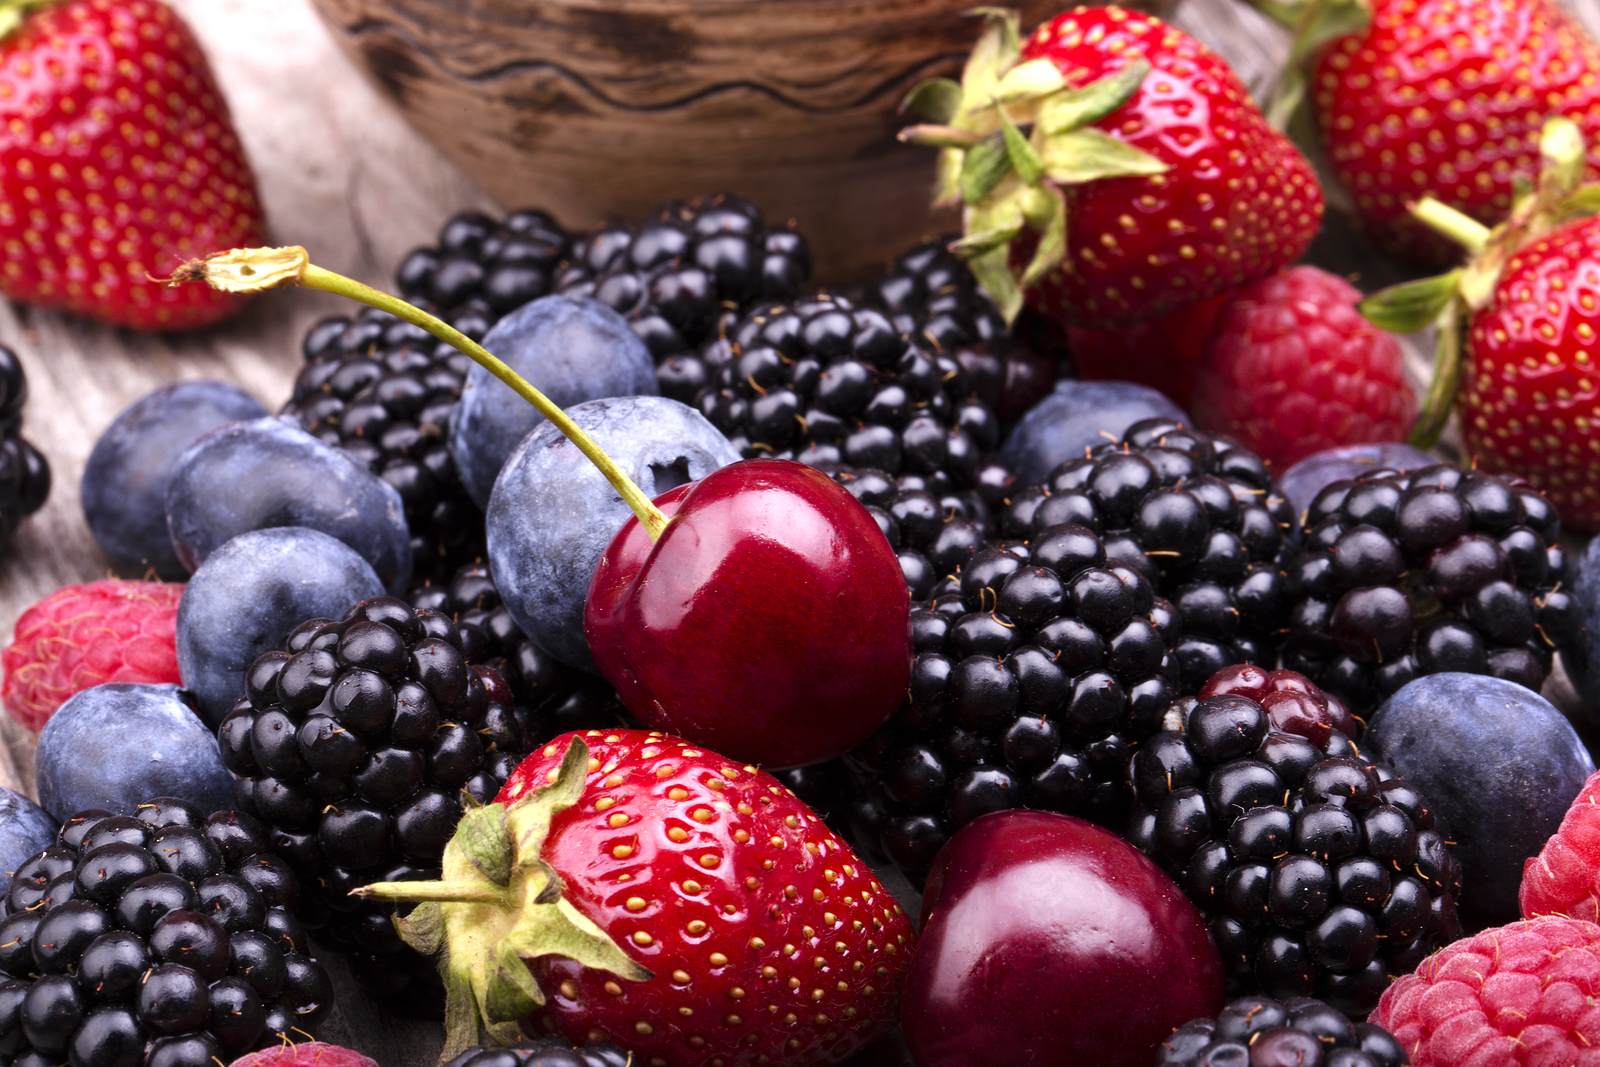
The starting point is to choose an appropriate photo, as not all pictures are suitable for this kind of transformation. That’s why any picture used should be one that will appear even better after deep contrast and bright colours are applied.
2) Duplicate the Background Layer
With the right image in hand, though, this is an easy process. To begin, work on the background layer. This layer should appear right away in the layers palette when the photo is opened. In fact, it will be the only layer in there. Then, duplicate this very background layer three separate times by simply pressing the buttons Ctrl+J in Windows or command+J on a Mac.
By doing that,you will have three new layers that all look exactly the same. These layers will now appear in the layers palette with the original background layer. The two layers in the palette should then be turned invisible by clicking on the visibility button listed. (This icon will look similar to an eye and be found on the left of every layer).

3) Edit the layers
From there, you can start editing the first layer. This layer will be labelled as Layer 1 in the palette. To pick the layer, click on it and then click on the filter menu that is found at the top of the screen. After that, the artistic icon can be clicked on and then the cutout button. That cutout button is what’s used to expand a new dialogue box. Place the numbers 4, 4, and 2 into the fields for levels, edge simplicity and edge fidelity. The blend mode on that specific layer can then be changed to the luminosity setting.
Next, the second layer can be edited, which will be labelled as Layer 1 Copy. Similar to the last layer edited, select the artistic button located on the filter menu.
Then, click the dry brush filter. As soon as that’s clicked, a dialogue box will open up. There, type in the numbers 10,10 and 3 for Brush Size, Brush Detail and Texture. Any changes made must be saved before the dialogue box is closed. Also switch the blend mode setting to screen.
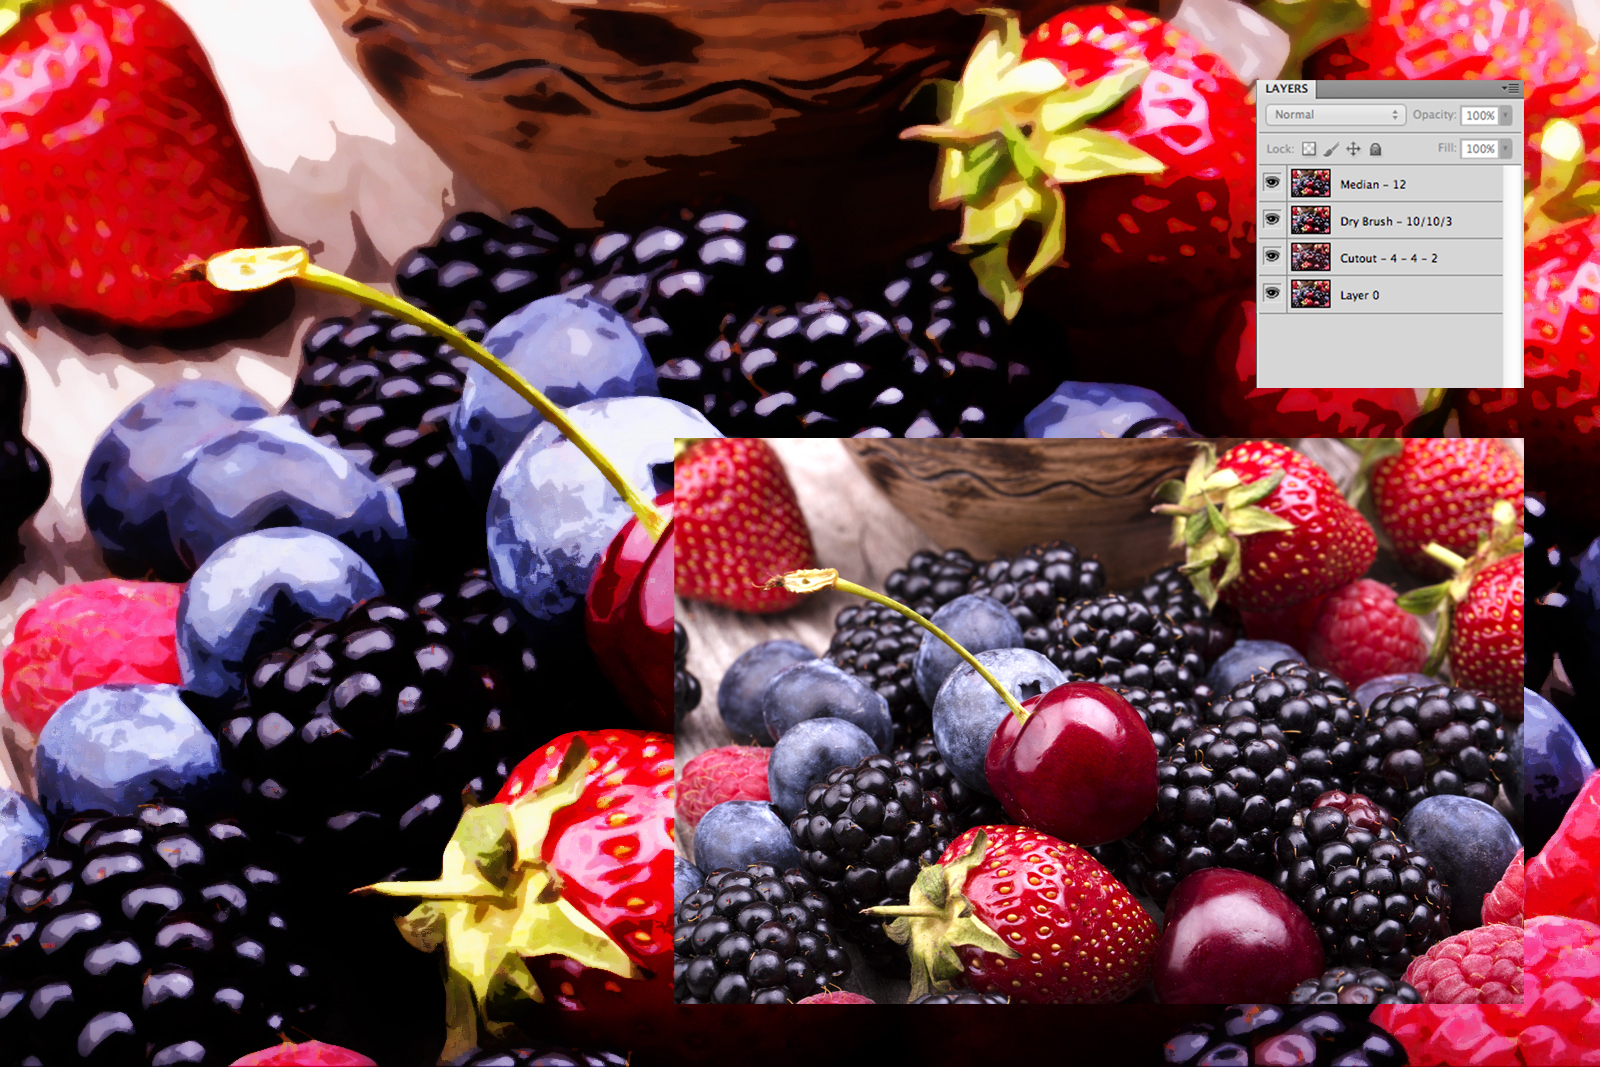
Finally, the third layer can be edited. This is also typically referred to as the top layer in the palette and should be labelled as Layer 1 Copy 2. The layer must be made visible so that it can be fully worked on. To do this, click onto the Noise button found on the Filter menu.
From there, select the Median option, which will in turn open the Median dialogue box. Next, write the number 12 into the radius box opening. That dialogue box must then be closed and the blend mode in the Layers palette has to be switched to Soft Light.
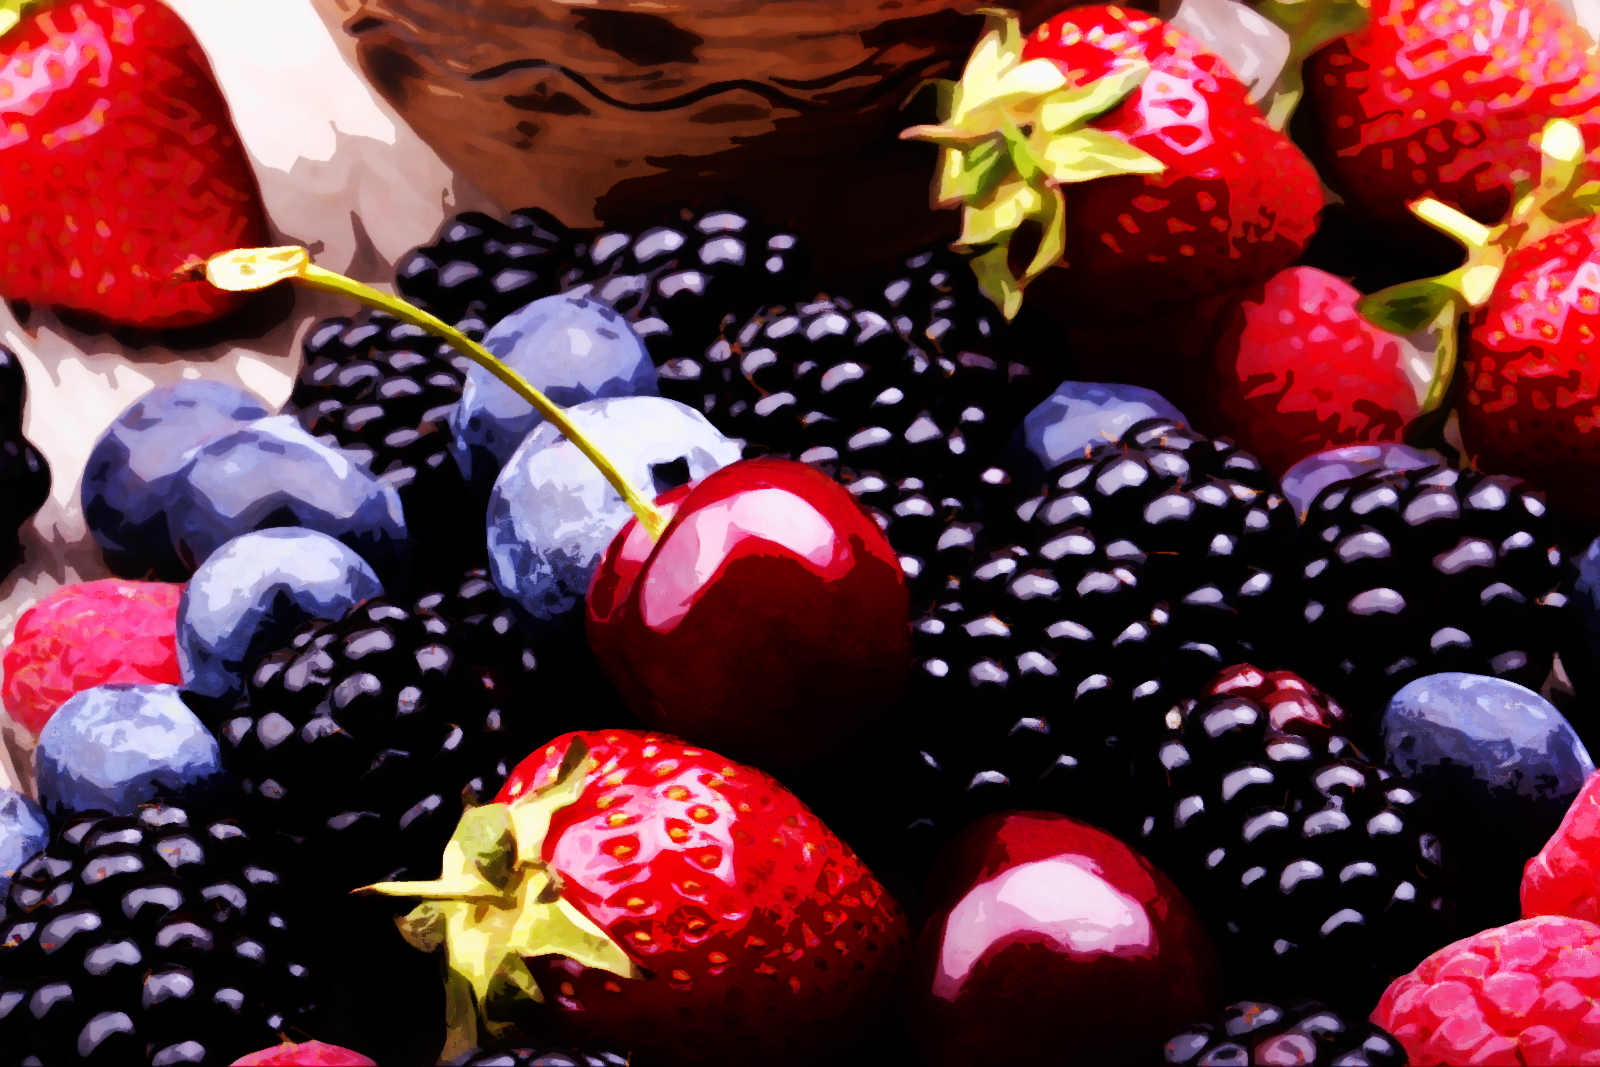
That’s it! You are all done. Your image should now look exactly like a watercolour painting – there will now be bright contrast, lively colours, soft lines and barely any detail.
We hope you found this useful and enjoy creating your very own watercolour masterpieces!